The main purpose of the instructions is to help you once and for all solve the question of how to install fonts in the Windows, MacOS and Linux operating systems. There is nothing difficult. It is enough to try once, and the installation of new font sets will take less minutes.
For Windows
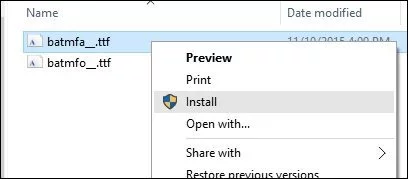
As the system is allowed to install fonts format EOT or TTF. Select one or more files, right-click and hover over "Install". The installation will start automatically after a click. It only remains to wait for the process to complete.

The alternative method is a bit more complicated and relevant for cases where the context menu does not contain the "Install" item or you need to add an impressive number of fonts to the OS. First go to the Windows directory and go to the Fonts directory. Then move the files there. No more operations are required.
You can get into the directory with fonts in 2 more ways. The easiest is to press WIN + R.
A window will open for entering commands. Copy the %windir%\fonts
line there and click on the OK
button.
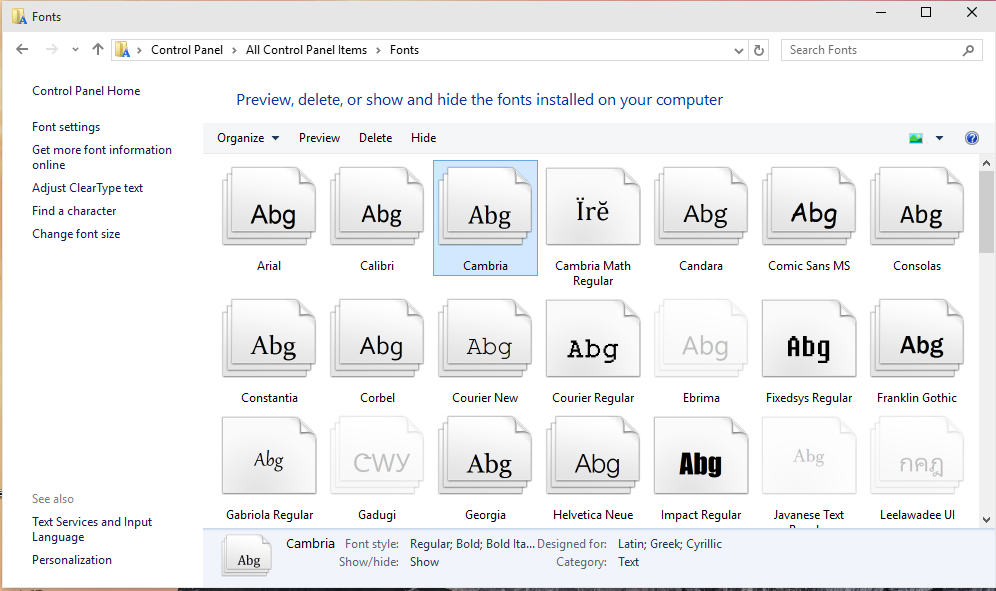
Another method takes a little more time - go to the "Control Panel" and find "Fonts"
in the section "Appearance and Personalization"
In the system folder is allowed to manipulate fonts. For example, delete or hide for display in applications. If you want to read some either in sets, click on the "View" button or 2 times on the files of interest. In a second, a special program will start.

By the way, installation is possible through a standard viewer. Open any font in it and click "Install." When the installation is complete, restart the applications where you are going to use the kit. For reliability, it is better to completely restart the computer.
For MacOS
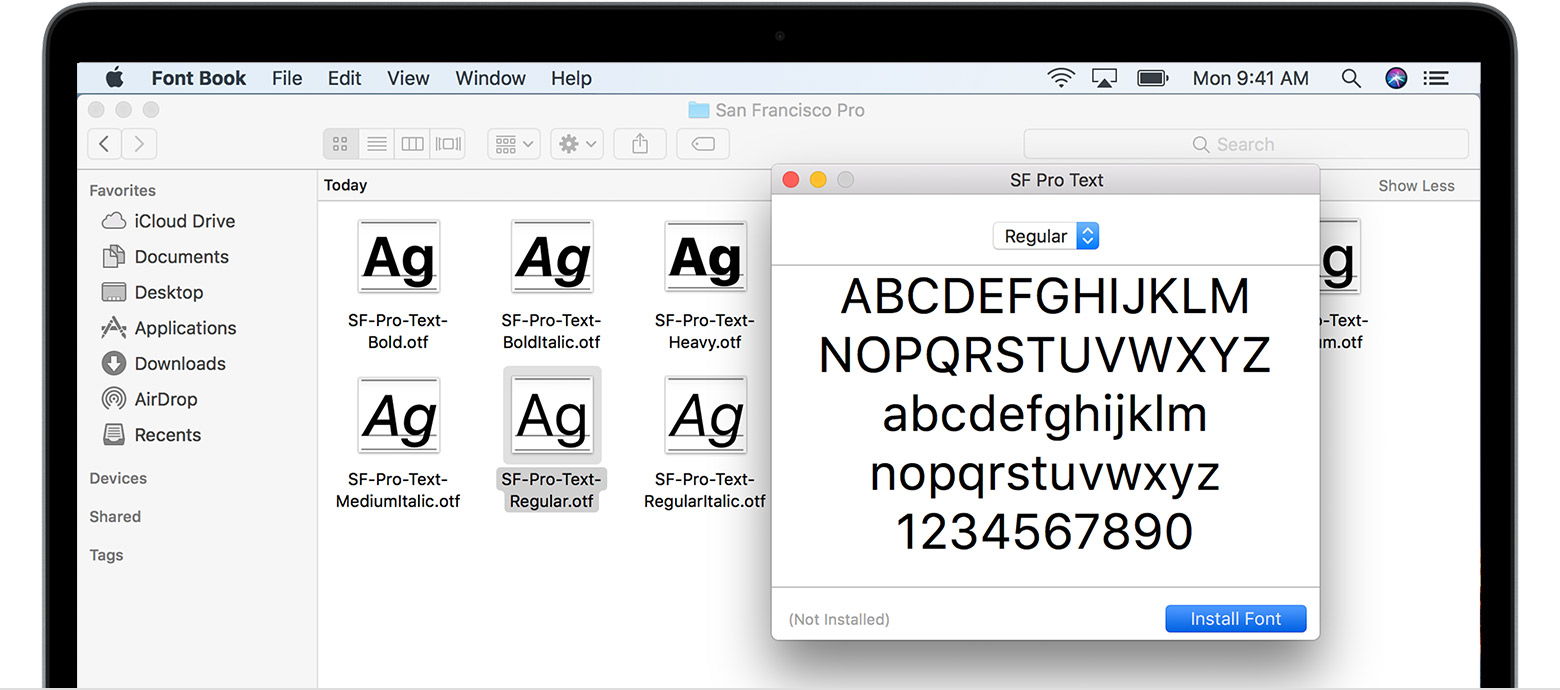
Like Windows, MacOS also supports EOT and TTF font formats. Before installation, we recommend closing active applications. Then there is no need to restart the programs later. Adding sets to the system is done elementary - click 2 times on the desired file and in the opened window click "Install". If everything passes successfully, the regular program "Fonts" is launched.

Only the administrator has the right to install fonts for all system users. It is done this way. Open the application "Fonts". Apple menu Hover the mouse over the "Fonts" and click on the "Settings". Find the inscription "Default account locations". In the drop-down list next to activate the "Computer". Enter the administrator login and password to confirm the action.
For Linux
In terms of supporting font sets, Linux is no different from Windows and MacOS. Unix-like systems work with the same EOT and TTF formats. Global fonts are located at /usr/share/fonts, and custom fonts are located in the .fonts folder from the user's home directory. Connecting families is actually reduced to moving files to the specified directories.
Photoshop, Figma, Sketch, Adobe InDesign and other graphic applications.
Installing the font in the program is the same as installing the font in the operating system. To use the font in Photoshop, Sketch or InDesign, you need to install it in your operating system. After installing the font, do not forget to restart the program in which you are going to use the font.
For WEB sites
If you downloaded the entire font, then in the ZIP archive you will find the file stylesheet.css.
This file will contain all the styles for connecting this font.
For example, you downloaded the font “Roboto”.
First, move the entire contents of the archive to a separate folder (for example,
"fonts/roboto").
Connect the stylesheet.css file either through HTML or through your main file where you write
the styles.
Via HTML: <link href = "fonts/roboto/stylesheet.css"
rel = "stylesheet" type = "text/css" />
Via CSS: @import url("fonts/roboto/stylesheet.css")
Careful when writing the correct path to the stylesheet.css file!
An example of using a font in your style file:
body {font: 15px ‘Roboto’, Arial, Helvetica, sans-serif;}
When downloading a single weight - for example, “Roboto Bold”, all the above actions are
similar.

Comments